Quench your summer cravings with bold, refreshing beverages
(Family Features) In between summer adventures and hot afternoons spent poolside, you’re likely looking to combat rising temperatures with a cool, refreshing beverage. This year, quench your thirst with drinks that play up the trendiness of bold flavors.
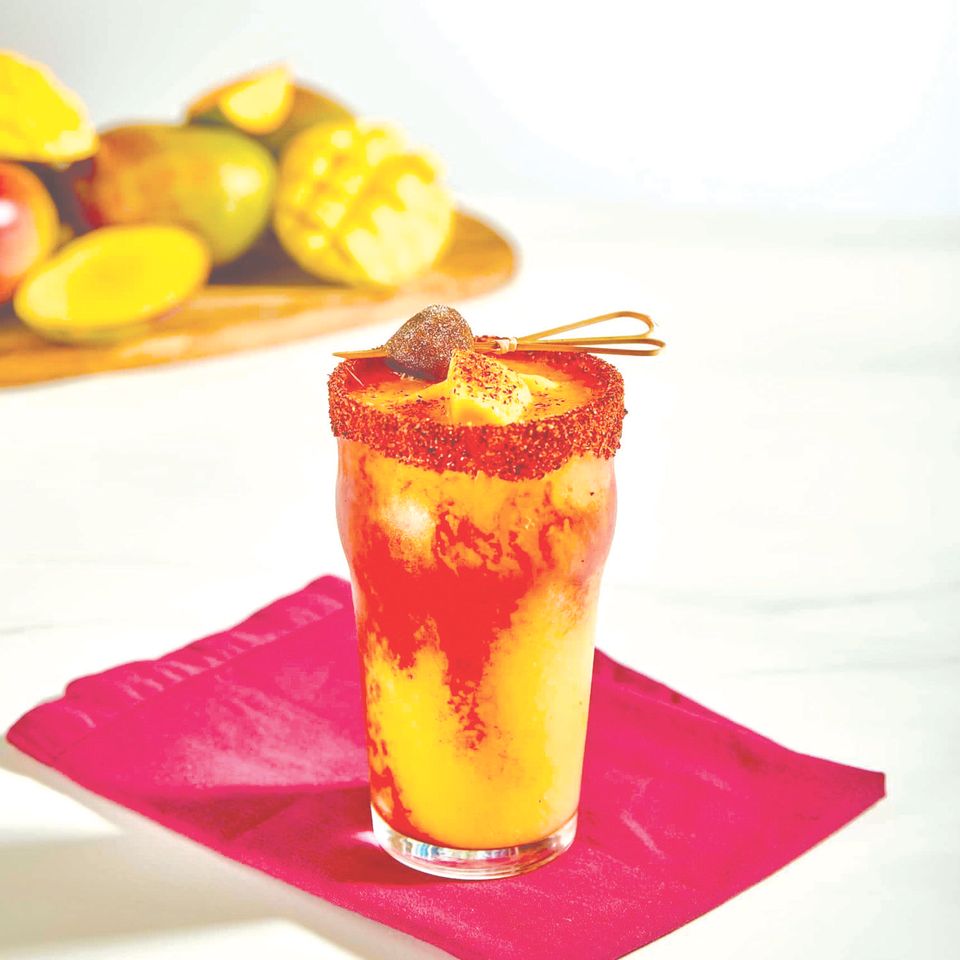
While many concoctions can help you beat the heat, some gems seem to hit the spot better than others. Consider one of the trendiest beverages that is increasingly becoming available at smoothie and juice bars nationwide but which you can also prepare at home: the tempting, bold taste of the Mangonada. With a harmonious fusion of sweet, spicy and tangy flavors, this thirst-quencher captures the essence of tropical indulgence with the majestic mango at the center of its symphony of flavors.
“Mango not only adds a burst of flavor but also brings a unique depth to the beverage,” said Dan Spellman, director of marketing for the National Mango Board.
Central to the Mangonada is Tajín Fruity Chamoy Sauce and Clásico Seasoning — a zesty blend of chili peppers, lime and sea salt — which are must-have ingredients to make the beverage. They combine to infuse the drink with a subtle kick, balancing the mango’s sweetness with a hint of spiciness that hits different.
Mangonada
Recipe courtesy of the National Mango Board
Ingredients:
• 1 cup fresh mango cubes, plus 5-6 cubes for garnish, divided
• 2 ounces fresh mango nectar
• 1/2 ounce lime juice
• 2 cups ice
• 1/2 ounce agave nectar
• 2 tablespoons Tajín Fruity Chamoy Hot Sauce, plus 2 ounces for garnish, divided
• 1 tablespoon Tajín Clásico Seasoning, for garnish
• 1 tamarind candy, for garnish (optional)
Directions:
Measure 1 cup mango cubes, mango nectar, lime juice, ice and agave nectar into blender cup. Blend until smooth.
In separate small dishes, add 1 ounce hot sauce and 1 ounce seasoning.
Dip rim of 14-ounce Collins glass into hot sauce then seasoning to coat. Drizzle remaining hot sauce along inside of glass.
In glass, pour 1 tablespoon chamoy sauce followed by blended Mangonada. Top with remaining fresh mango cubes and sprinkle with additional seasoning. Add tamarind candy to glass, if desired.